Connecting FXS Interfaces using Centronics Cable
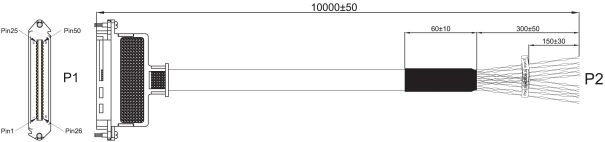
You can purchase AudioCodes' Centronics-type cable connector, as shown in the following figure, to connect the FXS interfaces to FXS equipment. The 10-meter cable (32.8 ft.) provides a 50-pin male Telco connector on one end and open leads on the other end, which need to be connected to your patch panel or distribution frame.
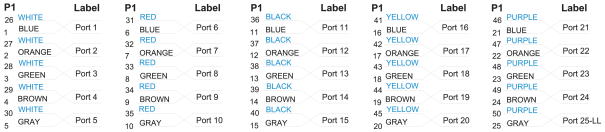
Orderable Centronics Cable and Pinouts
| ➢ | To connect the FXS interfaces using the Centronics cable: |
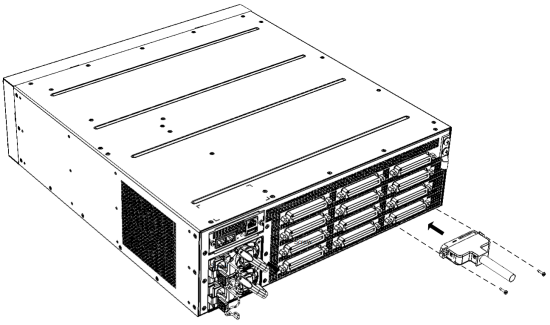
| 1. | Connect the 50-pin male connector on end of the cable to one of the FXS blade's 50-pin female Telco connectors located on the chassis' rear panel, and secure the connector with the two captive screws located on either side of the connector, using a Philips screwdriver: |
Connecting 50-Pin Telco Connector to Port on FXS Blade
| 2. | Terminate the wires on the other end of the cable to your patch panel or distribution frame. The wires are grouped in pairs with labels indicating the FXS channels. Make sure that you connect the wires according to the correct port channels as labelled on the wires. |
| 3. | Connect your analog equipment to your patch panel or distribution frame, by plugging their RJ-11 connectors into the RJ-11 sockets on the patch panel or distribution frame. |